
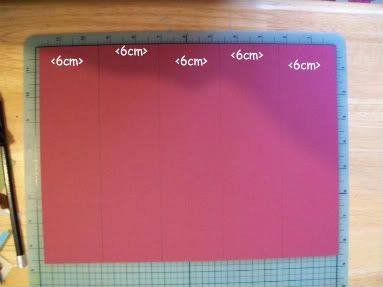
 Okay Step 1) Take a piece of 12" x 12" and cut to 21.5cm tall x 30cm wide
2) turn over the cardstock , then across the width with a pencil measure and mark score lines but do not score yet at 6cm. 12cm, 18cm, and 24cm.
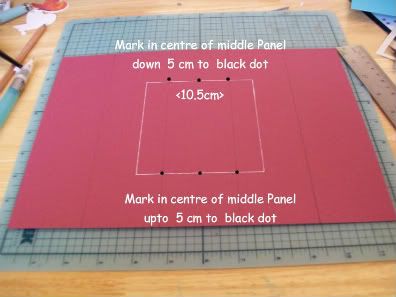
3) On the middle panel find the midway point of the width at the top and measure down 5cm from the top and do the same at the bottom; up. This is shown in the photo below the centre black dots. (I have also marked the side of the panel at this measurement just to help me keep straight). From the centre dot measure out 5.25cm either side top and bottom and draw a line.
Join the two sides together so you now have a rectangle.
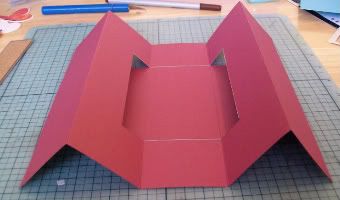
4) With a craft knife cut as shown in the photo below on both sides (marked with the black dotted line).
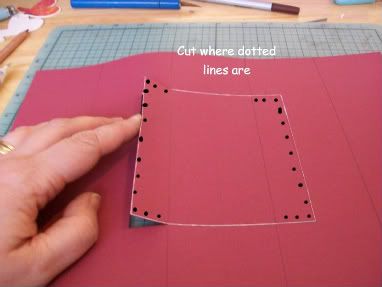
5) Now score your previously marked panel lines, do not score into the rectangle. Fold as Shown.
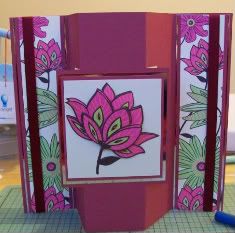
Decorate as desired, I have used Kate Knight Papers and decoupage from Trimcraft - But you can adapt to use any of the scrummy papers and embellishments available at Flutterby Crafts.
Imagine the Tilda papers and penny black stamps, Lush!! Once you have made the card once you can change the centre shape.
The Finished card fits into a Dl envelope.
Tracyxxx
2 comments:
That's great, will have to try it. Love to have new ideas. Thanks Tracy.
Joanna x
Your very welcome XX
Tracyx
Post a Comment